|
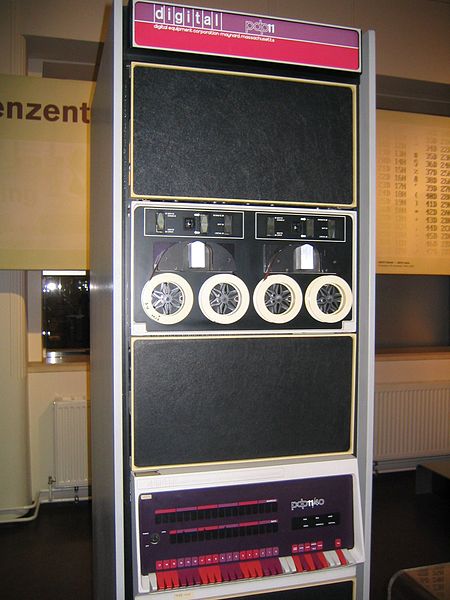
The Digital Equipment Corporation's
PDP-11™ series were popular mini-computers in use from the
early 1970's through the mid to late 1980's. Original PDP-11 computers were 'file cabinet' size. By
the late 1980's, they easily fit on a desktop. Even Heathkit produced a PDP-11 home computer using an
'LSI' chip, and running their version of the RT-11 operating system. The acronym 'PDP' apparently
comes from Programmed Data Processor.
There are a lot of resources available online for these machines, and it's no wonder to me why that is: They are
important in the history of modern computing.
Modern Standards That the DEC PDP Series Helped to Solidify
Back in the late 1950's and early 1960's, when the PDP series was born, there were competing standards
for a number of computing concepts that nowadays are taken for granted. Because of the widespread popularity
of the PDP series in businesses and in education, and the apparent influence on microcoprocessor
development, many standards became, well, STANDARD in computing.
During the 1970's, Digital Equipment Corporation pretty much OWNED the government and educational computing
market in the United States. Most likely it was because they offered competitive prices along with very good
equipment and software. DECWriter consoles, a basic 300 baud dot matrix printer with an attached computer
keyboard, were a VERY common site and made excellent operator consoles (since they logged everything onto paper).
Because of their widespread use on college campuses, they were natural 'learning environments' for computer
programming and computer science students (like myself). And they had support for the more popular compiled
and interpreted languages, like FORTRAN and BASIC.
As a result, the PDP-11 was a major influence on modern computing. Some of the more obvious (and significant)
developments that could be traced back to the PDP-11 include:
- The '8 bit octet' as the standard 'byte': Other byte lengths (CDC used 6 bits) were already
being used by other computer systems. The octet, being what it is, could store a single ASCII
character (7 bits). Graphics terminals often made use of custom character sets using the OTHER
128 available values (most significant bit set).
- Low-endian storage of 16-bit values. That's right, the PDP-11 deviated from the 'mainframe'
standard and stored its least significant byte FIRST within a 16-bit word. This was actually
necessary in order to make word and byte instructions interchangeable. It also helps SIGNIFICANTLY
when it comes to text processing. The 'low endian' concept carried over into the 8-bit microprocessor
realm for Intel, Motorola, Zilog, MOS Technology, and others. From there, 'backward compatibility'
kept it alive in 16-bit, 32-bit, and 64-bit processors.
- DMA: Digital Equipment's 'UNIBUS™' allowed devices to take over and send data without having
the CPU 'get involved'. It was the kind of architecture that would lead to ISA, PCI,
and other 'standard bus' architectures we see in modern machines.
- Extended Memory: The PDP-11 could ONLY access a 64k 'window' into address space. To accomodate
the limitations, optional memory management hardware (and physical memory beyond 64kb) could be
used to 'map in' a chunk of memory from a physical location to a 'virtual' one. This also
allowed multiple processes to have their own memory space without the need to swap to disk on
a context switch, and supported read-only and read/write 'chunks'. This is ALSO similar to
how the x86 (and other) processors handle virtual memory, by using a relocation table that
re-maps memory addresses from 'virtual' to 'physical', and only exposing the 'virtual' address
to user applications. Great minds think alike, indeed.
- Custom Hardware: DEC published the specification of the UNIBUS in hopes that people would
develop custom hardware for it. They also made it POSSIBLE to modify the RT-11 operating system
in order to write custom drivers for the custom hardware. THIS sort of 'open-ness' with
standards (and sample code, and documentation) is the KEY to the success of embedded systems
nowadays, particularly for those using operating systems like Linux and
FreeRTOS, as well as the success of Microsoft® Windows™.
- Graphical Displays: Although primitive, the 'VT' series terminals made 'visual editing' possible.
DEC was not the ONLY company to do this. HP had their own standard as well. I don't know about
IBM, but I would guess they had something, too. But the idea that a user would 'type in' things
into a form, instead of using PUNCH CARDS, was a HUGE change, even revolutionary at the time. It made
data entry possible without the use of expensive mechanical machinery. The average 'un-trained'
warehouse clerk could do it. And the displayed 'data entry form' on the screen could make data
entry a bit more intuitive (though the software author would have to 'make it happen'). It was,
in many ways, the predecessor to a DIALOG BOX that you see so often in modern GUI operating
environments.
- UNIX™ and the 'C' programming language: The PDP-11 was the original development platform
for the UNIX operating system and the 'C' programming language, which were developed concurrently.
The intent of UNIX was to make an operating system that could be installed on MANY different hardware
platforms. It made a lot of sense, considering how different many of these machines were, and the
need for highly trained operators and programmers. You wouldn't have to re-learn everything from
scratch when you changed jobs, or when the company changed hardware platforms, if you used the same
cross-platform operating system every time. And as we know, Linux is based on UNIX, and BSD is a
variant of UNIX, and OS/X uses the Mach kernel (derived from BSD at some point). And in the late
1970's, BSD-s IP stack became the essential STANDARD for the (then) Arpanet, which later became
the Internet. So you can thank your operating systems and Intarwebs on the PDP-11.
- The FIRST video game was written on the PDP-1. No kidding!
Emulation and Resources
If you are curious about the PDP-11 (and ancient mini-computers in general) there are emulators available,
many of which are open source, and downloads for operating systems and documentation that have been licensed
for personal and/or educational use without an license fees. We can probably thank HP and Compaq and Mentec
Corporation for that, since they are the ones who own[ed] various parts of the Digital Equipment Corporation's
intellectual property. However, as there are STILL commercial uses for the PDP-11 and its operating
systems (nuclear reactor control systems are ONE area that I'm aware of), any commercial use would require a
license of some kind.
Here is a SHORT LIST of resources that I found helpful. Some have direct links, some are simply names of
resources that you can do an on-line search for (to get a downloadable PDF) file, some are 'catalog references'
to manuals that you can download a PDF for if you do an online search. Nearly all of these are copyrighted
in some form and permission may or may not be given to download them in PDF form. But they ARE out there.
- SIMH PDP-11 (and other ancient computer) simulator
(more info HERE)
Typically available as a package/port on Linux, FreeBSD
Additional links for Software (including operating systems)
Link page for Computer History and Simulation HERE
Other Notes: Press CTRL+E from the PDP-11 console to jump into the emulator where you can mount devices, or exit
the program. You're welcome. I discovered this by hacking.
- Disk images and software
(tarballs, at least some of which are disk images with license info)
In particular, I would recommend THIS
one for use with SIMH (it works pretty well for me), though it is NOT Y2K compliant. The date isn't that important, though.
- Additional binary image resources (licenses included in various directories)
- PDP-11 library, another collection of PDP-11 disk images, primarily for RSX-11
- PDP-11 Assembly Language (online catalog reference)
- MACRO-11 Language Reference Manual (similar catalog reference)
- 'Essential' Manuals (no links in this list, use on-line search for PDFs)
NOTE: a LOT of them can be found HERE, already mentioned above
- Introduction to RT-11
- RT-11 Guide to Documentation
- RT-11 System Release Notes
- RT-11 Installation Guide
- RT-11 Programmer's Reference Manual (very very important!)
- PDP-11 MACRO-11 Language Reference Manual (also very very important)
- PDP-11 Keypad Editor User's Guide
if you get stuck in 'EDIT' and can't get out because you can't find the VT-100 keypad keys,
use "SET EDIT EDIT" on reboot to avoid this and use the line editor instead, or modify the startup file
to include 'SET EDIT EDIT'
- RT-11 Keypad Editor Reference Card (quick reference for EDIT)
- RT-11 System Utilities Manual (very very very important)
Especially important are: PIP MACRO TYPE DIR HELP (yes, HELP). You can transfer files using 'PIP' and 'TYPE'
by using a GUI operating system, then doing cut/paste to/from the console. It's slow, but effective.
As an example, 'PIP FILE.TXT=TT:' is similar to 'COPY CON FILE.TXT' or 'cat >FILE.TXT' (CTRL+Z is EOF)
- RT-11 System Generation Guide (if you want to customize the operating system, you CAN! It's like Linux's 'make config')
- RT-11 System Internals Manual
- RT-11 Volume And File Formats Manual (useful if you want to create/read native files and mount them in RT-11)
- RT-11 IND Control Files Manual
- RT-11 Software Support Manual
- Punch Card reference (important for the PDP-11 card reader)
A Few Useful Hints
There are a few things you might want to know before you try and set up your own emulator. As an example, I'll
run through the process that I worked through with minimal documentation and what I remembered from 1979 and 1980.
- INSTALLATION
- When the SIMH emulator starts, it will prompt you with '>'. You will need to mount a disk drive to boot from,
and then boot it. The rtv53_rl.dsk
disk image file works with the RL drive. The command sequence is:
attach rl0 rtv53_rl.dsk
boot rl0 rtv53_rl.dsk
This will get you into the setup menu to install RT-11 on another disk drive.
- You will need to temporarily get back to the emulator's command environment to mount a 2nd disk.
It's no problem at all to get back into the emulator and create a new disk image file.
Simply press CTRL+E to get back to the emulator's command environment, then:
attach rl1 os.new.dsk (follow any prompts)
cont
This will let you pick up from where you left off in the RT-11 install process.
- You will then be prompted to remove the disk, once the file copy is complete. Press CTRL+E again to get back to the emulator.
Then, to unmount the volume, enter:
detach rl1
cont
- 'Rinse and repeat' for the backup disk, using a different mount file (such as os.backup.dsk).
This should at least get you through the install process. You'll be creating an OS and a backup OS disk
image. The backup OS disk image has all of the system files marked 'read only', so it's a bit of a pain
to clone it and recover your OS that way. Instead you should just keep this file somewhere anyway and
clone the disk image to back it up via 'cp -p' or 'copy' (depending on your host OS).
After you have built (and backed up) your RT-11 image, which should have a few MB of storage available,
you can boot it easily with a single command.
- First, exit the SIMH simulator, and create a file (I called mine 'boot.bat'). The disk image is 'os.dsk'.
attach rl0 os.dsk
attach rl1 data.dsk (this is optional)
boot rl0
- Then, to boot your OS, use the command 'simh boot.bat' with appropriate paths (and name changes) applied
to 'simh' and 'boot.bat' (in some cases the program is called 'simhv', you may need to prepend paths, and
you might also need to run it from a particular directory, so Your Mileage May Vary on this one).
- File Extensions: You probably recognize a few, but some have different meanings
- COM files - these are COMMANDS, not executables, similar to CMD or BAT.
STARTn.COM is used by the boot process. STARTX.COM is for FG/BG. STARTS.COM is for
single-user mode. STARTM.COM is for multi-user mode. You'll probably start up in
FG/BG mode by default. Changing the default is a little tricky. I recommend using
the 'BOOT' command to re-boot into a particular mode. More on that later.
- SYS files - operating system, bootup, and device drivers (loadable... yeah, loadable!)
- SAV files - these are compiled programs, similar to 'EXE' in DOS or Windows.
- REL files - similar to SAV files but can be loaded as a FG job (they're fully relocatable)
Note that the concept of FG and BG is a little backwards - the default job, the system
console, is "background".
- MAC files - MACRO-11 source. Device drivers and whatnot are COMPILED, and these are the source
files the system builder uses, like compiling a custom Linux or BSD kernel.
- Commands: At the '.' command you can invoke a program in a few ways
First, type the program name followed by arguments. Examples:
- DIR *.MAC (lists all the '.MAC' files)
- TYPE STARTX.COM (copies STARTX.COM to the console device)
Alternately, you can use 'PIP TT:=STARTX.COM' (careful with PIP, it's unforgiving)
- MACRO MYPROG.MAC (to assemble your program 'MYPROG.MAC' - creates MYPROG.OBJ)
LINK MYPROG (to link the OBJ and create MYPROG.SAV which you can THEN run by typing 'MYPROG')
Second, use 'R program' to start the program in 'interactive mode'. You will get a '*' prompt for
arguments. To terminate the program and get back to the command interpreter's '.' prompt you'll have
to use CTRL+C. Yeah, it's sort of bogus but that's the way it's done...
Third, use 'RUN program' to run the program. The semantics between 'R' and 'RUN' are somewhat difficult
to explain, and I'm not sure I fully understand it. RT[Fine]M on that one.
- BATCH: There is a batch program called 'BATCH' that lets you set up control statements to run batch processes.
Normally it would be driven by a card reader, but you can assign the 'BA' pseudo-device to read from
whatever, if I remember correctly (I haven't experimented with BATCH yet, but I remember using it in
High School, and it reads from "the default BATCH device", whatever you assign. RT[Fun]M again).
- Transferring Files: Since there is no obvious way to transfer a file to or from the PDP 11 simulator,
other than attaching a log to the console or using cut/paste via the host operating system and the 'PIP'
program, I thought I might mention a few little tricks that I have used.
-
The tape device 'TM' (on the simh side) and 'MT' (on the RT11 side) is the best way to transfer a
large number of files. I have written a utility called
'dectape' that makes transferring
large numbers of files VERY easy. More information can be found at the github repository. In summary,
you are using the magnetic tape device, and the 'dectape' utility translates between RT11 tape format
and the host's file system.
-
The paper tape device lets you transfer files in BOTH directions! The down-side is that it requires CRLF
line terminations, so on OS/X and BSD and Linux you'll need to convert your line endings from <CR;>
or <LF> to <CRLF>.
NOTE: for translating CRLF endings, THIS might help.
- To copy a file from the host to the PDP-11 simulation using the 'Paper Tape' device:
- use CTRL+E to get into the simh monitor and enter this command to attach a file to the card reader:
attach PTR filename.ext
cont
- Then, from the '.' prompt in the simulated console, enter
PIP filnam.ext=PC:
- When you are done, detach it from the card reader from the simh monitor (press CTRL+E again)
by entering:
detach PTR
cont
- To copy a file from the PDP-11 simulation to the host using the 'Paper Tape' device:
- use CTRL+E to get into the simh monitor and enter this command to attach a file to the card reader:
attach PTP filename.ext
cont
- Then, from the '.' prompt in the simulated console, enter
PIP PC:=filnam.ext
- When you are done, detach it from the card reader from the simh monitor (press CTRL+E again)
by entering:
detach PTP
cont
-
You can ALSO use a similar 'trick' by attaching an input file to the card reader device 'CR' or an output
file to 'LPT' and THEN using PIP to transfer files in a similar fashion. On the 'simh' side, the devices
are 'LPT' and 'CR'. On the RT-11 (simulation) side, they are 'CR:' and 'LP:'. Keep in mind that RT11 may
translate lower case to upper case "for you". Unfortunately there's a bug in the card reader
that only lets you transfer a single file (you have to exit the simulation to fix it). Upside, it's forgiving
on line feeds and might be needed to test out the 'BATCH' system in the PDP-11 simulator.
You can, however, set device mode parameters on various devices from the 'simh' monitor (and within RT-11)
to prevent case translation. These values are a bit cryptic (values like '8b' for example), vary per device,
and are documented in the (somewhat sparse) simh documentation and various RT-11 documentation. At least
for the printer, you might include 'SET LP LC' (to allow lower case) in your 'STARTn.COM' file so that case
shifting is turned off for the line printer device. Some programs, after all, may need a valid 'LP' device
and as such, you might want to set it up this way by default.
So have fun playing with your simulated ancient computer! Or not.
MACRO-11 Code Examples
The PDP-11 had an assembler called 'MACRO-11'. It was a two-pass assembler, not unlike Microsoft®'s
MASM&tm; assembler, but with fewer features and more limitations. But anyone familiar with MASM would
recognize many of the SAME features, though Your Mileage May Vary when trying to write code with MACRO-11
if you are an experienced MASM coder.
Hello World
.TITLE HELLO
.MCALL .PRINT,.EXIT   ; tell assembler I want these two from SYSMAC.SML

START:  .PRINT #HELLO ; call OS function to print string, address HELLO
        .EXIT         ; call OS function to terminate the program

HELLO: .ASCIZ /HELLO, WORLD/ ; an ASCII string ending with a zero byte

.END START
Macros for PUSH and POP
;------------
; PUSH macro
;------------
.MACRO PUSH VAL
        MOV VAL,-(SP) ; store VAL onto the stack
.ENDM

;-----------
; POP macro
;-----------
.MACRO POP VAL
        MOV (SP)+,VAL ; pop item from stack, store in VAL
.ENDM
Macros for calling a function with parameters on the stack
;------------------------------------------------
; CALL macro - call a function (up to 26 params)
;------------------------------------------------
.MACRO CALL FUNC,A,B,C,D,E,F,G,H,I,J,K,L,M,N,O,P,Q,R,S,T,U,V,W,X,Y,Z
PSHCTR=0
.IRP VV,<Z,Y,X,W,V,U,T,S,R,Q,P,O,N,M,L,K,J,I,H,G,F,E,D,C,B,A>
.IF NB <VV>
; if the parameter is not blank, add 2 to the 'PUSHCTR' and push the value
; note that they push in REVERSE order so that the 1st param is always 4(R5)
; when the FNDEF macro is used, regardless of how many params are actually
; pushed.  this allows for variable length argument lists.
PSHCTR=PSHCTR+2
        PUSH VV
.ENDC
.ENDR
        JSR PC,FUNC
        ADD #PSHCTR,SP ; fix the stack on return
.ENDM CALL
Macros for defining functions (with parameters, compatible with CALL)
;---------------------------------------------------
; FNDEF macro - define a function (up to 26 params)
; function must exit/return with FNRET
;
; USAGE:  FNDEF function[,param[,param[...]]]
;         where 'function' is the label for the CALL
;          and  'param' lists stack parameters
; NOTE:  all stack parameters are 1 WORD each.
;---------------------------------------------------
.MACRO FNDEF FUNC,A,B,C,D,E,F,G,H,I,J,K,L,M,N,O,P,Q,R,S,T,U,V,W,X,Y,Z
.MACRO .FNDEF CCC,VVV
CCC=VVV
.ENDM
FUNC:   PUSH R5
        MOV SP,R5  ; R5 is now the 'base pointer'  0(R5) == old R5
PRMCTR=2  ; for the parameters, points initially to pushed JSR
VARCTR=0  ; for automatic vars (resets stack pointer stuff)
          ; use the 'AVARS' and 'AVAR' macros following FNDEF
          ; (they are not valid outside of this context)
.IRP VV,<A,B,C,D,E,F,G,H,I,J,K,L,M,N,O,P,Q,R,S,T,U,V,W,X,Y,Z>
.IF NB <VV>
PRMCTR=PRMCTR+2 ; must add 2 first so 1st param is 4(R5)
;VV=PRMCTR       ; reference the parameter as VV(R5)
        .FNDEF <VV>,\PRMCTR
.ENDC
.ENDR
.ENDM

;-------------------------------------------------------------------------
; FNRET macro - exit from a function.  R0 typically contains return value
;-------------------------------------------------------------------------
.MACRO FNRET
        MOV R5,SP  ; restore previous stack pointer
        POP R5
        RTS PC
.ENDM
Handling Automatic Variables
;---------------------------------------------------------
; AVARS macro - declaring MULTIPLE automatic variables
;               within an FNDEF context
;     (this only works for WORD variables)
;
; USAGE:  AVARS var[,var[,var[...]]]
;---------------------------------------------------------
.MACRO AVARS A,B,C,D,E,F,G,H,I,J,K,L,M,N,O,P,Q,R,S,T,U,V,W,X,Y,Z
.MACRO .AVARS QQQ
        SUB #QQQ,SP  ; make room for variables on stack
.ENDM
.MACRO .AVRS. NNN,VVV
NNN=VVV
.ENDM
; NOTE:  can be called more than once, but only within an FNDEF
;AVARSQ=VARCTR ; store current value
        .AVRS. <AVARSQ>,\VARCTR  ; assign to numeric value
.IRP VV,<A,B,C,D,E,F,G,H,I,J,K,L,M,N,O,P,Q,R,S,T,U,V,W,X,Y,Z>
.IF NB <VV>
VARCTR=VARCTR-2
;VV=VARCTR ; reference variable as V(R5)
        .AVRS. <VV>,\VARCTR  ; subs numeric value for 'VARCTR'
.ENDC
.ENDR
AVARSQ=AVARSQ-VARCTR ; new value - I want the delta!
        .AVARS \AVARSQ  ; uses numeric value for 'AVARSQ'
.ENDM

;------------------------------------------------------------------
; AVAR macro - make room for a single variable of specific size
;              useful for arrays, structures, etc.
;              ONLY valid within an 'FNDEF' context
;
; USAGE: AVAR varname[,size]
;        where 'varname' specifies the name
;         and  'size' is the optional size (in words)
; to use the variable, reference it as 'varname(R5)'
; if a structure is involved, define the offset to
; the member and reference as 'varname+member(R5)'
; NOTE:  size CAN be zero (creates an alias)
;------------------------------------------------------------------
.MACRO AVAR NAME,SIZE ,?VV
.MACRO .AVAR NNN,VVV
NNN=VVV
.ENDM
VV=2
.IF NB <SIZE>
VV=SIZE+SIZE
.ENDC
.IF NE <SIZE>,<0>
VARCTR=VARCTR-VV
        SUB #VV,SP     ; make room for this one variable
.ENDC
;NAME=VARCTR ; reference variable as NAME(R5)
.AVAR <NAME>,\VARCTR
.ENDM
MEMSET and MEMCPY as macros
; -------------------------
; MEMSET - uses R0, R1, R2
; -------------------------
.MACRO MEMSET DST,BVAL,COUNT ,?L1,?L2
         PUSH R0
         PUSH R1
         PUSH R2
.IF NB <BVAL>
.IF DIF <BVAL>,<R1>
         MOV BVAL,R1
.ENDC
.ENDC
.IF NB <DST>
.IF DIF <DST>,<R0>
         MOV DST,R0
.ENDC
.ENDC
.IF NB <COUNT>
.IF DIF <COUNT>,<R2>
         MOV COUNT,R2
.ENDC
.ENDC
         TST R2            ; if count zero, skip loop
         BZ L2
L1:      MOVB R1,(R0)+     ; copy R1 (byte) into (R0)
         SOB R2,L1         ; use .MCALL SOB if processor has no SOB

L2:      POP R2
         POP R1
         POP R0
.ENDM


; -------------------------
; MEMCPY - uses R0, R1, R2
; -------------------------
.MACRO MEMCPY SRC,DST,COUNT ,?L1,?L2
         PUSH R0
         PUSH R1
         PUSH R2
.IF NB <DST>
.IF DIF <DST>,<R1>
         MOV DST,R1
.ENDC
.ENDC
.IF NB <SRC>
.IF DIF <SRC>,<R0>
         MOV SRC,R0
.ENDC
.ENDC
.IF NB <COUNT>
.IF DIF <COUNT>,<R2>
         MOV COUNT,R2
.ENDC
.ENDC
         TST R2            ; if count zero, skip loop
         BZ L2
L1:      MOVB (R0)+,(R1)+  ; copy (R0) into (R1)
         SOB R2,L1         ; use .MCALL SOB if processor has no SOB

L2:      POP R2
         POP R1
         POP R0
.ENDM
Sample usage of CALL and FNDEF as Hello World app
.TITLE FNTEST

.INCLUDE /MYMAC.MAC/ ; include macros (above) contained in 'mymac.mac'

FNDEF MAIN ; define main function 'MAIN' with no parameters
           ; using FNDEF creates a stack frame for automatic variables
           ; it also creates a label 'MAIN' that points to start code
        CALL MYPRINT,#MSG
        .EXIT

MSG:    .ASCIIZ /HELLO, WORLD/

.EVEN ; required if string has odd length (WORD alignment for code)

; automatic variables and pointers are numeric defines that are
; address offsets from R5.  To use them in an instruction or to
; pass them as a parameter, reference them as VARNAME(R5).
; If you need to get the address, you can do something like this
;       MOV R5,R0
;       ADD VARNAME,R0   ; R0 is assigned the address of VARNAME
;       MOV R0,VAR2(R5)  ; VAR2(R5) now contains address of VARNAME
; Note that R0 will always be 'nuked' by a function call.  Other
; registers should be preserved by PUSH, then POP before returning.
; The register PUSH should happen AFTER auto vars are declared, and
; the POP should happen right before FNRET.

FNDEF MYPRINT,ARG    ; defines function 'MYPRINT' with ARG as argument
      PUSH R1        ; sample, preserve R1 (isn't really being used)
      .PRINT ARG(R5) ; make OS call - ARG(R5) is string's address
      POP R1         ; sample, restore R1's value to what it was
      FNRET          ; stack cleanup and return

.END MAIN ; marks end of program with startup code at 'MAIN'
Additional Resources
SHORTER LIST of Emulation Resources (in addition to 'short list' above)
- The SIMH application, which is what I use for emulating a PDP-11. Also good for other 'classic' architecture
- Bootable Disk Images HERE and
HERE and
HERE and
HERE and
HERE, appear to be ok (licensed) for personal use
- Another SIMH-related site, with information and screenshots.
Copyrights, Trademarks, and other related legal stuff
Original photograph from top of page, licensed under Creative Commons
and the GNU Free Documentation License.
The image file was copied to this server to avoid 'bandwidth theft' from wikipedia.
UNIX is a registered trademark by The Open Group
|